Tuesday, December 29, 2015

Kori Pulimunchi | Chicken Pulimunchi | Chicken in Tangy Spicy Sauce

0
Kori Pulimunchi is a traditional dish famous in Tulunadu (Udupi/Mangalore). The name says it all that this dish stands for :-) Kori = Chicken, Puli = Tamarind(sour), Munchi = chilli so it's chicken in tangy, spicy gravy. It tastes great with neer dose, idli or aapam.

Recipe Type: Nonveg | Main dish
Prep time: 20 mins | Cooking time: 25 mins.


Ingredients:
Chicken: 500 gms cut into medium pieces.
Dry red chillies: 10
Coriander seeds: 1 tbsp
Cumin seeds: 1/2 tbsp
Fenugreek seeds:1/4 tsp
Black pepper :1 tsp
Garlic : 7-8 cloves
Turmeric: 1/2 tsp
Tamarind: 1 marble size
Kokam Skin /Punarpuli : 2 (Optional)
Chakke: 1 small piece (optional)
Lavanga: 1-2 (optional)
Coconut : 1 tbsp (optional)
Medium sized onion: 3
Curry Leaves: 2 sprig
Ghee: 1 tbsp
Oil: 2 tbsp

Method:

1. Wash and clean chicken and apply some salt, turmeric powder and a little ghee and keep it aside.

2. Dry roast coriander seeds, cumin seeds, fenugreek seeds and pepper. Roast red chillies with a little oil and roast coconut until its golden brown in color.

3. Add tamarind, kokam skin, garlic and a little water to the roasted ingredients and grind to a smooth paste in a mixer.

4. Finely chop onions, keep 2-3 tbsp of onion separately for tempering later.

5. Heat oil in a deep pan and add the remaining onions and saute until its golden brown in color.

6. Add chicken pieces and fry for 4-5 minutes.

7. Next mix in the ground paste, salt and 1/2 cup water and cook it on medium flame until the gravy thickens and chicken is cooked completely. Adjust water to get the desired consistency of the gravy.

8. Heat ghee in a small pan and add curry leaves and 3 tbsp of onions that we had kept separately and saute until the onions turn brown.

9. Add this tempering to the chicken, close the lid and cook for a minute and turn off the flame.

10. Serve the delicious Kori pulimunchi with neer dose, dose, aapam or rice. It goes well with chapathi also.


Notes:
1. Adjust the amount of tamarind if you are not adding punarpuli/kokam peel (Mangosteen peel).
2. Coconut is optional but it gives a little substance to the gravy.
3. I like to keep it a bit dry to go with dose, if you are serving with rice you can add more water or coconut milk and make more gravy.
Read More »

Dal Tadka Recipe

0
Dal tadka or tempered lentils dish is very popular all over India. Restaurant menus are incomplete without this flavorful dish. It tastes great with roti/phulka or any flavored rice.


It's a dhaba (roadside eateries) style recipe where dal is pressure cooked with onion, tomato, chillies and tempered with flavorful spices. I have made this dal a lot of times and it tasted as good as from a restaurant. Here is how I make it.


Ingredients: 
Yellow Pegion Pea/Toor Dal/Togaribele: 1/2 cup
Red Pegion Pea/Masoor Dal/Masoor Bele: 1/2 cup
Medium Size Onion: 1
Medium Tomato : 2
Green Chilli: 2
Ginger: 1 inch
Turmeric powder: 1/2 tsp
Red Chilli Powder: 1/2 tsp
Garam Masala: 1/2 tsp
Kasoori Methi (Dried Fenugreek Leaves): 1 tsp
Salt to taste
Fresh Cream : 2 Tbsp (Optional)
Garlic: 4-5 cloves
Butter/Ghee: 2 tbsp
Cumin Seeds: 1 tsp
Broken dry red chilli:  1 
Coriander Leaves : handful

Method:

1. Soak both lentils in enough water in a pressure cooker and keep aside for 15-20 minutes.
 
2. Finely Chop Onion, Tomato and Ginger and slit Green chillies lengthwise and add to the cooker.

3. Add Salt, Turmeric and few drops of oil to dal and pressure cook it for 3-4 whistles.

4. When the Dal is cooked open the lid and mash it with a ladle or a wired whisk and keep on medium flame.

5. Add Garam masala powder, Red Chilli powder, crushed Kasoori Methi leaves, Coriander leaves and Fresh cream (if using) and mix well.

6. Adjust the consistency by adding water and bring to boil and turn off the flame.

7. Heat ghee/butter in a tempering pan and add cumin seeds, chopped garlic, Asafoetida and broken dry red chilli and fry until the garlic turns to golden brown in color.

8. Pour the tempering on dal and close the lid.Garnish with remaining coriander leaves and Serve hot with flavored rice or roti/chapathi.

Notes:
1.You can add Bengal gram (Chana dal) along with yellow and red Pegion pea or make it with just one of the lentils.
2.Cream is optional but it gives a smooth texture to dal and enhances the taste.
3.Squeeze in a tsp of lemon juice if the tomatoes are not sour enough.
4.Adjust the red chilli powder and garam masala powder according to your spice preference.


Read More »

Sunday, December 13, 2015

Agasi Chutney | Flax Seeds Chutney Powder

1
Flax Seeds or Agasi (Kannada) Chutney is made with Flax seeds which is a very good source of omega 3 fatty acids. So it's known to increase the good cholesterol level. Western countries are just getting to know about the health  benefits of flax seeds and you can find many products that contain flax seeds in super market these days specially brown bread with flax seeds. 

In India, there are many ways of using these super healthy seeds in regular diet. Agasi Chutney is a popular recipe in North Karntaka along with Shenga /Ground Nut Chutney. It takes only abt 15 minutes to prepare it and it can be stored for upto 15-20 days in airtight container.

You can include this spicy chutney in your diet in various ways, it tastes great when mixed with curd and can be eaten with Chapathi or Jawar Rotti.

Ingredients: 
Agasi /Flax Seeds : 1 Cup
Red Chilli Powder : 1 Tbsp
Curry Leaves: 1 sprig
Turmeric : 1/4 tsp
Tamarind : 1 small marble size
Sugar: 1/2 tsp
Garlic : 3-4 cloves
Salt to taste

Method:
1. Heat a deep pan and roast flax seeds on low heat until the seeds turn aromatic. It will splutter a lot, so it's good to use a deep pot for roasting the seeds.

2. Cool down the roasted seeds a bit and grind with all other ingredients to a coarse powder. Store it in an airtight jar. It can be used for 15-20 days at room temperature.


Read More »

Monday, December 7, 2015

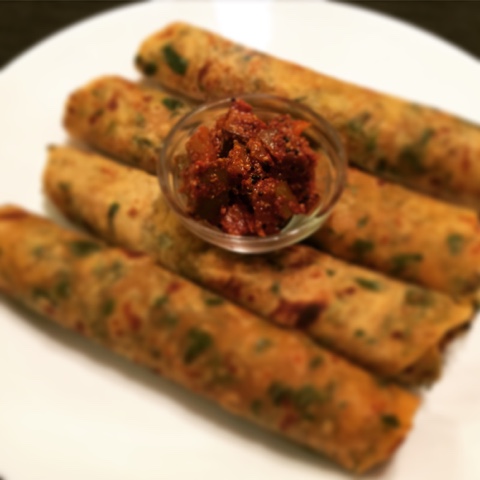
Methi Thepla | Gujarati Flat Bread recipe

0

Time is really flying. My little bunny is going to turn two soon. A lot of things have changed over these 2 years. A lot of experiments have gone in from 1st baby food to the food that she is eating now. As all the moms complain its very difficult to understand the kid's plan, the food they love today can straightaway get rejected tomorrow. When she refuses to eat greens and vegetables I try to feed the same thing in a different form. Theplas or parathas come in handy when I want to include more greens and veggies in my kid's diet

Here is the recipe for easy, delicious Methi Thepla from Gujarat, India. It's a flat bread made with fresh fenugreek leaves and all or combination of whole wheat flour, Gram flour and Corn flour with other Indian spices. This filling dish makes a full meal in itself. You can either serve with pickle/yogurt or just Theplas. It's ideal for packing for picnics and long journeys. I usually make it with only wheat flour to get more softer theplas. Also adding mashed over ripe bananas makes it very soft and delicious for kids.

Ingredients:

Fresh Fenugreek Leaves: 1.5 cups
Whole wheat Flour:  1.5 cups
Cumin Seeds: 1 tbsp
Sesame seeds: 1 tbsp
Curd/Yogurt: 2 tbsp
Ginger paste: 1 tsp
Chilli paste: 1 tsp
Turmeric: 1 tsp
Red Chilli Powder: 1 tsp
Sugar: 1/2 tsp (Optional)
Salt to taste

Method:

1. Wash and roughly chop the fresh fenugreek leaves, add all the ingredients leaving flour and yogurt and mix well.

2. Next add in flour and yogurt and knead into a stiff dough. Cover and keep for 30 minutes.

3. Knead again and divide the dough into equal portions. Dust with dry flour and roll into thin discs.


4. Heat a griddle and shallow fry on both sides until golden basting with ghee.

5. Serve hot with pickle and chilled yogurt.


Notes:
1. If you are making it for kids you can add a mashed overripe banana. It gives the theplas a mild sweet flavor and it tastes delicious.

Read More »

Sunday, December 6, 2015

Badane Koddel | Green Brinjal Sambar

0


Koddel Means Sambar in Tulu. My mother's Badane or bendekayi koddel (Brinjal or lady's finger Sambar) is my all time favorite. This sweet, sour and spicy dal preparation is a simple and comfort food that brings back fond memories from my childhood.  Most of the evenings after school me and my brother used to fight over comic books.  I always got 2nd turn to read those stories and I wasted no time and mostly ended up reading it while eating dinner. The super delicious koddel and super exciting stories from comic books were a crazy combination those days :) Those crazy, funny and carefree moments I try to relive through food:))

Here is how to make this easy and comfort food.

Ingredients: 
Togaribele /Toor Dal: 1 cup
Green slender brinjal : 2
Thick Tamarind Juice : 1/2 cup
Turmeric powder: 1/2 tsp
Jaggery : 1 -1.5 tbsp
Saru/Rasam Powder: 2 tsp
Slit Green chillies: 2
Coconut oil/Ghee : 1 tbsp
Mustard seeds: 1 tsp
Cumin seeds: 1/2 tsp
Hing/Asafoetida: 1/4 tsp
Curry Leaves: 1 sprig
Broken dry red chilli: 1
Coriander leaves for garnish
Salt to taste

Method:

1. Wash and soak dal in enough water for 15 minutes, add a pinch of turmeric and few drops of oil and pressure cook for 3-4 whistles.

2. Put Tamarind juice, Jaggery, Turmeric powder, Green chillies and 1 cup water in a pot and bring to boil.

3. Chop Brinjal into small pieces and add to the boiling tamarind mixture and cook for 5-8 minutes or until the brinjal turns tender.


4. Mash the cooked dal and add to the pot, add salt and rasam powder and water if needed to adjust the consistency and boil it for 10-15 minutes.


5. Heat oil/Ghee in a tempering pan and add mustard seeds, when it splutters add cumin seeds, broken dry red chilli, Hing and Curry leaves and saute for 30 seconds. Pour the tempring on the koddel and close the lid. Let it boil on low flame for 1-2 minutes and turn off the flame.


6. Garnish with chopped coriander leaves and serve hot with rice and ghee.

Click here for Home Made Sarina pudi /Rasam powder recipe. 

Notes:
1. Simply replace Brinjal with Lady's finger to make Bendekayi koddel.
Read More »

Aloo Gosht | Mutton Chops and Potato Stew

0


Aloo Gosht or Mutton Chops cooked with potato chunks is a recipe from India/Pakistan region but the recipe I follow is from a Chinese friend. He used to bring all the ingredients home and make this amazing chops with potato when we had home parties. We used to call it as his signature dish although he didn't have much knowledge of Indian spices or the method of cooking :) It's also my husband's favorite so I tried to replicate it with slight variation and it was an instant hit at home. My in laws totally loved it when they visited us. Its kind of become my signature dish too now;-) I make it only when we have guests at home as I don't eat mutton and my husband needs to empty the pot:)
So here is the recipe of Aloo Gosht | Mutton Chops and Potato Stew tried and tasted by my family and friends.


Ingredients:

Mutton chops : 500  gms
Medium size Potato : 3 
Curd : 1 cup
Curry powder: 1.5 tbsp
Turmeric: 1/2 tsp
Coriander leaves: 1/2 bunch
Curry leaves :4-5 sprigs
Green chillies - 5-6 (adjust to your taste)
Ginger : 1 inche
Garlic :  8-10 cloves
Onion :2 medium
Ghee/clarified butter for cooking: 4 tbsp

Method:
1.  Marinate mutton chops with Salt, curry powder, turmeric powder and yogurt and leave for half an hour.

2. Grind coriander leaves, curry leaves, green chillies, ginger and garlic to a coarse paste and add to the marinated chops and leave it for 3-4 hours.


3. Heat ghee in a deep pan and add chopped garlic and saute for 30 seconds.

4. Add chopped onion and saute until it turns golden brown. 

5. Now add the meat piece by piece. Save the remaining marinade paste.

6. Saute till the meat is tender and the masala paste is almost dried up. It takes abt 30 mins. 


7. Add potato cubes and add the remaining marinade paste. Add 1 cup water and cook without lid for about 10 mins then cover the lid, let it cook in low flame until done. It takes abt 1 hour to cook completely. Garnish with coriander leaves and serve hot with Flavored rice or any Indian Flat bread. 


Curry powder:
You can use any store bought curry powder or make it at home.

Ingredients for curry powder:

Mustard:1/2 tsp
Cumin: 3 tbsp
Coriander seeds: 6 tbsp
Red Chilly : 7-8 (preferably kashmiri/byadagi chillies)
Turmeric: 1/4 tsp

Curry leaves: 4-5 sprigs
Pepper corn: 1 tsp
Fenugreek seeds : few seeds
Bay Leaf: 1
Cinnamon: 2 pieces

Cloves: 4-5
Green Cardamom: 5-6
Garlic: 4-5 cloves 

Dry roast all the ingredients, put it in a blender along with 2 tbsp fried onion and make a slightly coarse powder. Store in an airtight jar. 


Notes:

1. You can replace it with chicken but reduce the cooking time as chicken gets cooked faster. 
2. Add more water if you like to have more gravy/sauce. 

Read More »

Saarina Pudi | Rasam Powder

0

Learn how to make simple and quick Sarina Pudi /Rasam Powder. This is my mother's recipe that I follow to a T. Until Recently my mother used to make it and pack enough powder to last for 6 months. I started making it myself as the taste of freshly pound powder takes the dishes to a different level altogether :) I make small batches enough to last for a month so the aroma and freshness is retained in the Saru (rasam), Koddel or any other dishes that I use it in.

Ingredients:

Dry red chillies (Bydagi or Kashmiri - Low spice variety) : 100 gms
Coriander seeds: 50 gms
Cumin Seeds: 25 gms
Mustard seeds: 2 Tbsp
Fenugreek Seeds: 2 tsp
Coconut oil: 1 tbsp 

Method:
Heat oil in a thick bottomed deep pan and roast all ingredients on low to medium flame. Roast one by one until they turn crispy and aromatic. Spread the roasted spices on a big tray and let them cool down for 15 mins. Grind to smooth powder and store in airtight jar.


Read More »

Potato and Paneer Stuffed Grilled Capsicum | Grilled Peppers

0

When I started the blog in August I was over excited and trying to post everything that I was cooking (almost!). I quite enjoyed checking the comments, views and FB page views etc for about 3 months. Then my initial enthusiasm started fading away, often I started cooking thinking of posting the recipe and halfway I felt bored to click pictures and do plating and I said forget it, will post it next time. I got so busy with my office work and  my hyper active toddler that there came a point when I started wondering is this all? Have I lost interest in blogging so soon?


I kept thinking how to bring back that energy and passion. Then a friend of mine called me to say she is following my blog regularly and she likes the simple ingredients and explanation. I was really happy and the table had turned, I felt charged up and headed straight to the kitchen to find these beautiful, colorful capsicum/bell peppers sitting in the corner of the fridge. They looked so inviting that I decided to try a new recipe. Here is the super delicious potato and paneer stuffed grilled capsicum recipe. It's kind of a paneer burji with some variation that I used as stuffing. After I finished making them I still had energy to make a gravy to go along with it so I guess I am quite motivated now :-) So let's check the list of ingredients (quite a lengthy list but easy to find:)
Cleaned Capsicum Cups

Ingredients:

For Grilled Capsicum
Medium size capsicum/bell peppers : 4
Finely chopped medium onions :2
Finely chopped Ginger: 1 tbsp
Finely chopped Garlic: 1 tbsp
Boiled, peeled and mashed Potato : 1
Grated Paneer/Cottage Cheese : 1.5 cups
Oil: 2 tbsp
Mustard seeds: 1/2 tsp
Cumin Seeds: 1/2 tsp
Fennel seeds: 1/4 tsp
Sesame Seeds: 1 tbsp
Red Chilli powder: 1 tsp
Turmeric powder : 1/2 tsp
Coriander powder : 1 tbsp
Cumin powder: 1/2 tbsp
Garam masala : 1/4 tsp
Lemon juice : 1 tbsp
Salt to taste
Coriander Leaves: 2 tbsp

Method:

1. Wash and dry capsicum, Cut them into half vertically and remove seeds and pith. (See the pic)
2. Heat oil in a Pan and add mustard, cumin and fennel seeds and fry until they splutter. Mix in sesame seeds and stir.
3. Add Finely chopped ginger and garlic and saute until the raw smell disappears.
4. Add finely chopped onions and fry until they turn translucent.
5. Mix in turmeric powder, red chilli powder, Coriander powder, Cumin powder and garam masala and give a quick stir.
6. Add mashed potato and grated paneer, add salt to taste and combine everything well.
7. Add lemon juice and mix in coriander leaves and turn of the flame.
8. Let it cool down a bit, then start filling the mixture into the capsicum cups.
9. Apply a little oil on the stuffed capsicums and grill them at 180 degree Celsius for 15-20 minutes or until you see wrinkles on capsicum.
Ready to go in the oven

Grilled Capsicum

You can skip some ingredients or add some of your own like peanut powder, shredded coconut etc. Also you can top it with grated cheese before grilling if you plan to serve them as starters. I made a simple onion tomato gravy with fresh cream to go with chapathi.

For Creamy Gravy:
Finely chopped Onion : 2
Pureed tomato : 2
Oil: 1 tbsp
Cumin seeds: 1/2 tsp
Ginger garlic paste: 1 tbsp
Slit Green Chillies : 2
Red chilli powder: 1/4 tsp
Turmeric Powder: 1/4 tsp
Coriander powder: 1 tsp
Garam masala : 1/4 tsp
Raisins: 1 tbsp (optional)
Broken Cashew: 1 tbsp (optional)
Fresh Cream : 1/2 cup
Salt to taste

Method: 
1. Heat oil in a pan and add cumin seeds, when they splutter add chopped onions and fry until they turn golden brown in color.
2. Add Ginger garlic paste and fry until raw smell disappears. Add in raisins and broken cashews and mix well.
3. Mix in tomato Puree, salt, red chilli powder, turmeric powder, Coriander powder and garam masala and fry until oil separates.
4. Add 1/2 cup water and bring it to boil, add slit green chillies and boil for 1-2 minutes.
5. Add fresh cream and bring to boil. Turn off the flame and garnish with coriander leaves.
6. Drop in grilled capsicum into the gravy before serving with any Indian flat bread.
Ready to serve - Grilled Capsicums in Creamy Gravy

Notes:
1. You can grill the stuffed capsicum on stove top also by arranging them in a single layer in thick bottomed pan and shallow fry them for 8-10 minutes. Keep stirring them in between to avoid burning.
2. The other option is to cook them in microwave. Cook until you see the wrinkles on capsicum.

Read More »